From first enquiry to getting paid 👋
A quick walkthrough of the whole job, in order. Each step shows the screen and points out what to tap. You can come back to this any time from Tools → How to use the app. New here? Do the setup below first so your quotes and prices are right from the off.
Getting started — set up your details
- Tools → Business Details: add your logo, business name, phone, address and email — these go on every quote and invoice automatically.
- Still in Business Details: set your bank details (for the invoice “how to pay”), your payment terms, and your guarantee wording — and your coverage rates (m² per bag) if you render thicker or thinner than standard.
- Mats → Prices: the app comes with real starter prices, but check them against your merchant and tweak any that differ — that's what makes your quotes accurate.
- Set your “why choose us” selling points in Business Details — they're added to the end of every quote's scope.
- Everything you set here syncs and is remembered, so you only do it once.
Your jobs at a glance
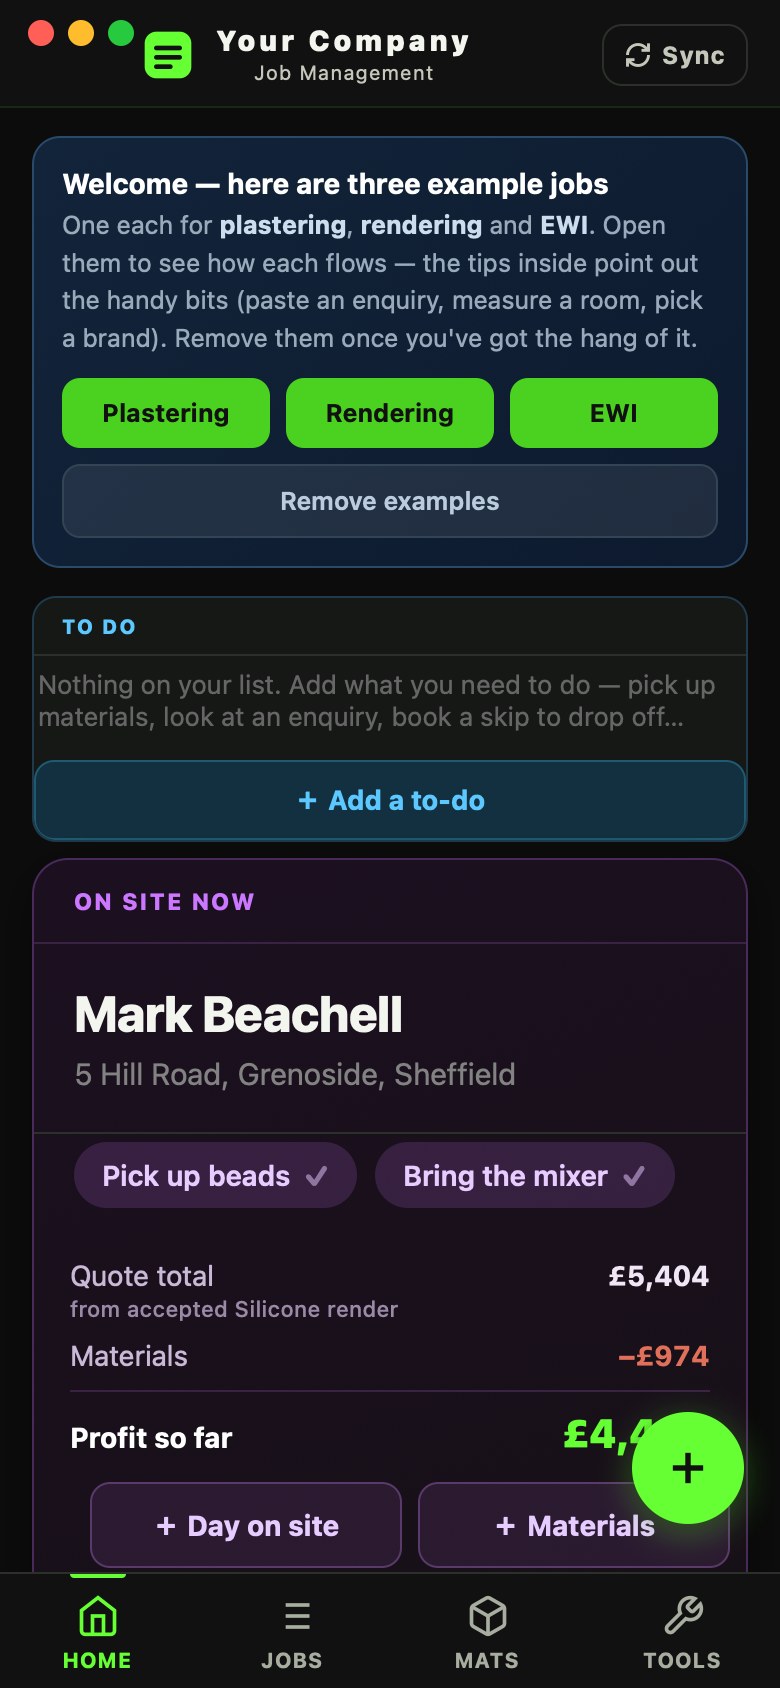
- The To do card at the very top is your own list — add things like “pick up mesh” or “book a skip” (see its own guide below).
- The “On site now” card is the job you're working on today — big, so you can't miss it. Tap it to open.
- Your reminders show as chips. Tap one when it's done and it ticks off (✓).
- The big green + button (bottom right) is how you add a new job — it's the only one you need.
- Bottom bar switches between Home, Jobs, Mats (materials) and Tools.
Add a new job

- When an enquiry comes in, tap the green + and fill in the customer's name, address and phone.
- Add a quick note of what they want (e.g. “render front + gable”).
- Save — the job now lives in your list, starting as an Enquiry.
- As you quote, book and invoice, the job's status moves along the tabs automatically.
Open a job — everything in one place
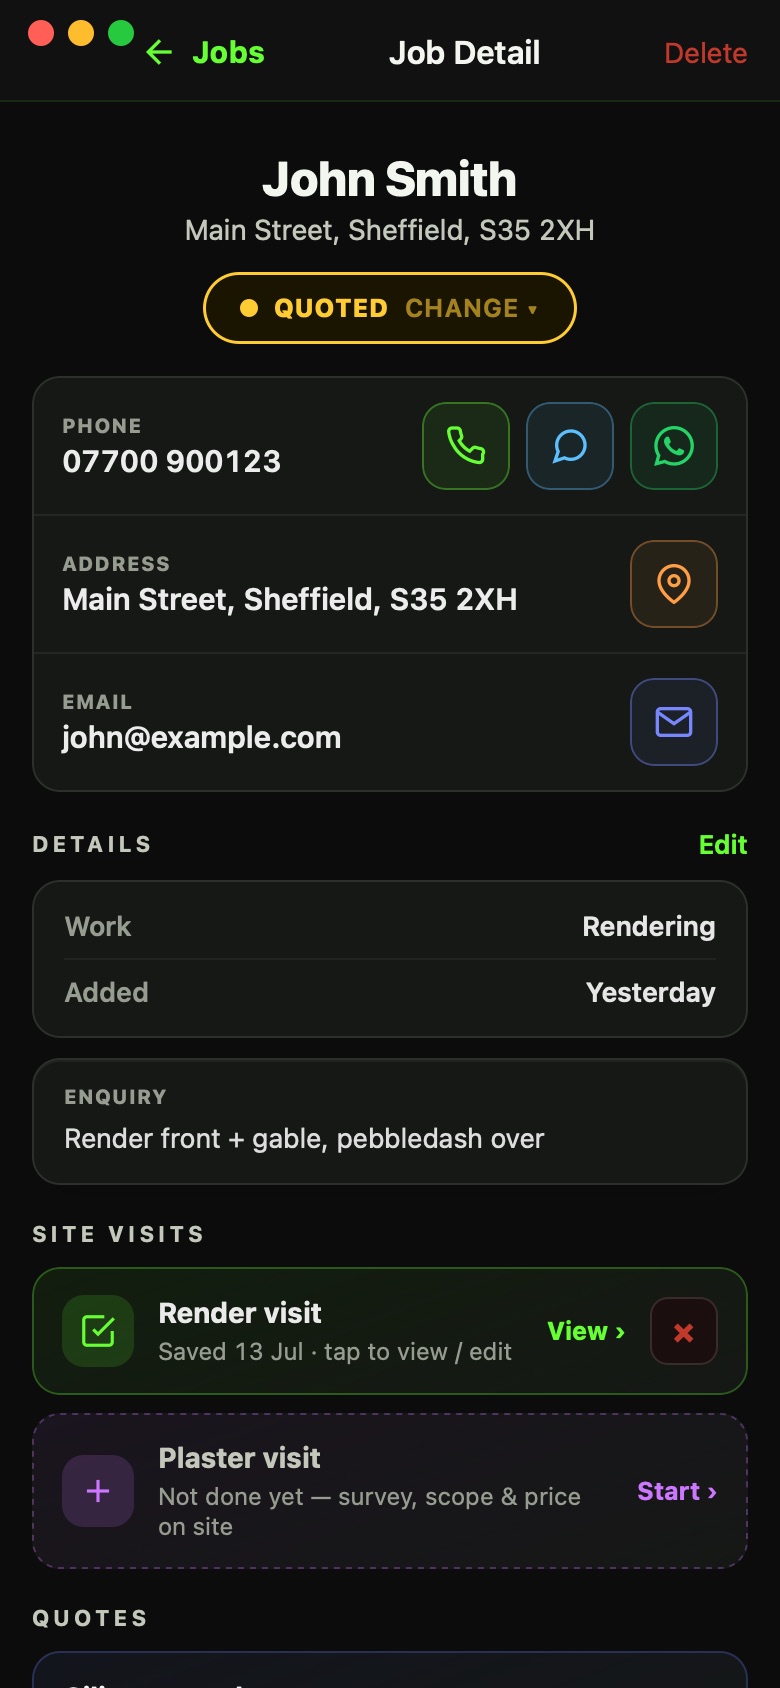
- Tapping a job opens its detail — customer info, call/text/Maps, and the full Workflow.
- Workflow buttons run the job top to bottom: Site Visit → Quote → Book Date → Invoice → Ask for Review.
- The Reminders section is where you add and tick off tasks for this job.
- A ✓ appears on Site Visit / Render Visit once you've saved one.
Site visit — pick your system
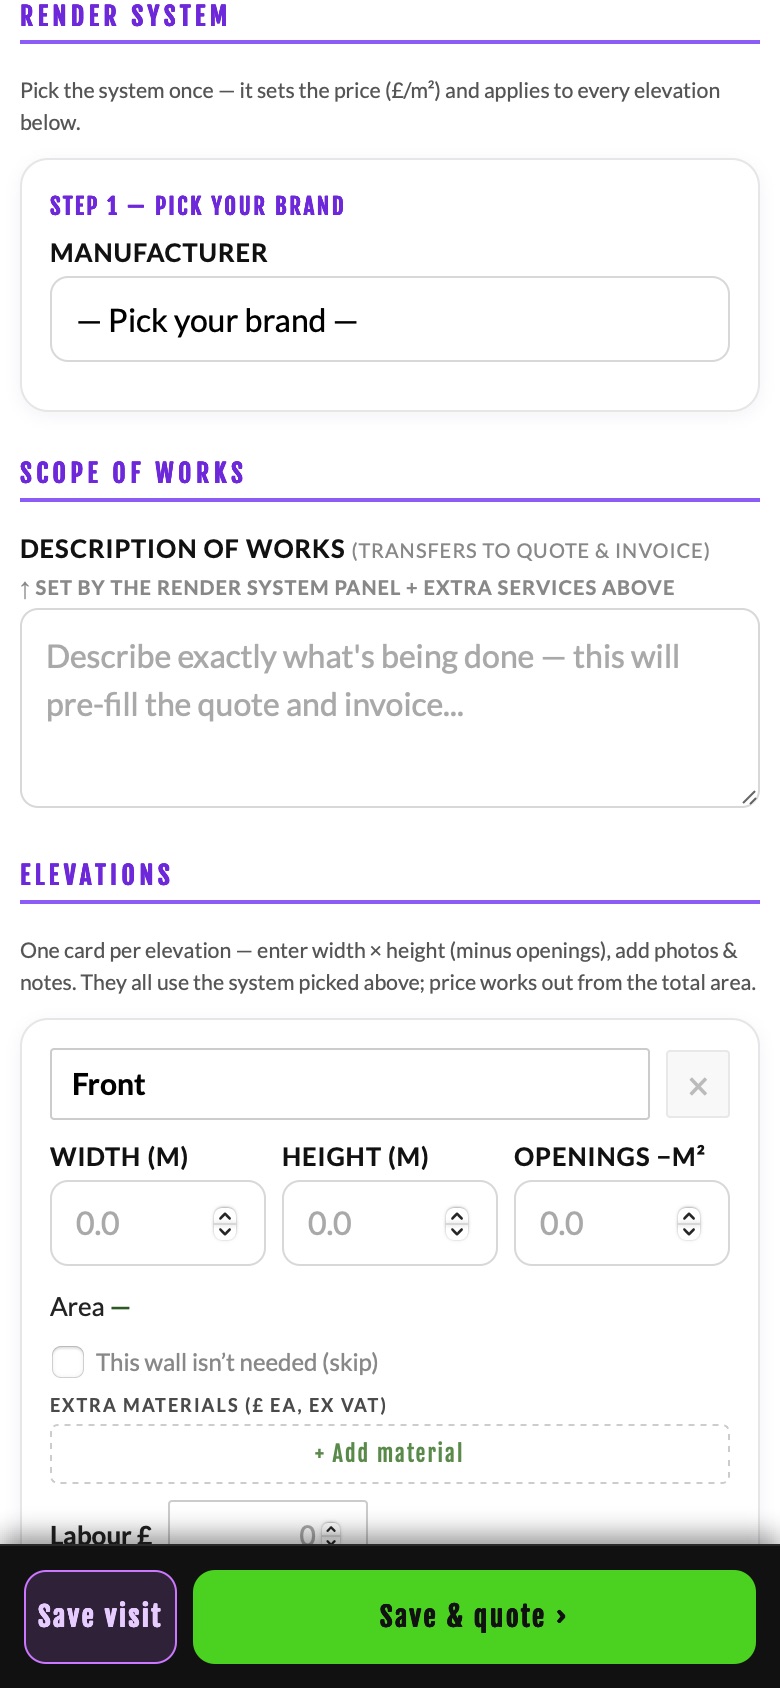
- Pick your render system once at the top — it sets the price per m² for the whole job.
- The Scope of Works writes itself from the system you chose (product, prep, guarantee) — you can edit it.
- Tick hack off or add building prep and it updates both the price and the scope.
- Add an elevation card for each wall (width × height); the total area works out the price.
- Everything here carries into the quote and invoice — measure and scope once.
Measure a wall from a photo
- On any elevation card in the visit, tap Measure this wall.
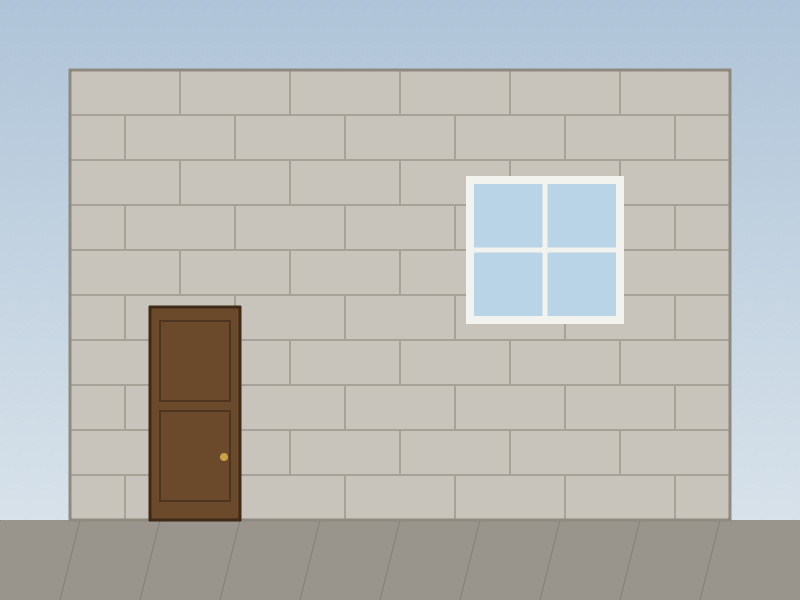
- New to it? Tap “Try an example” to load this practice wall — a block wall with a door and a window — and learn the steps without needing a real photo.
- Set the scale: tap the left edge then the right edge of the door. The app knows a door is about 838mm wide, so now it knows the real size of everything in the shot.
- Outline the wall: tap each corner to go round it, then tap the first dot again to close the shape — the m² works itself out.
- Pinch to zoom in for accuracy and drag with one finger to move around. Outline the door and window as their own areas to take them off the total.
Your To-do list
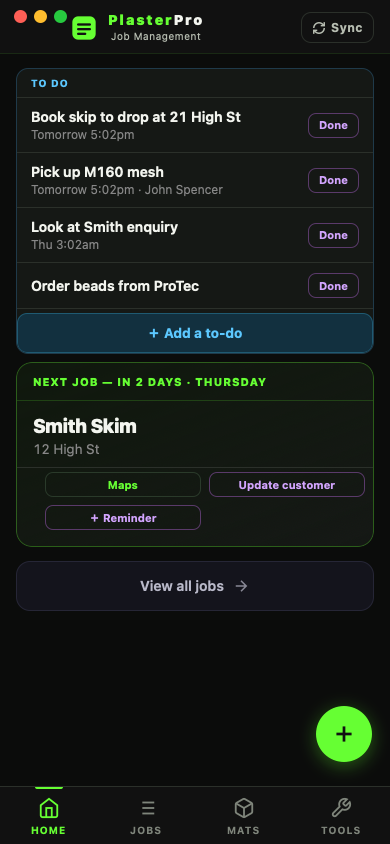
- The To do card at the top of Home is your own list — jobs are never dumped into it.
- Tap + Add a to-do, type what you need to do (e.g. “Book skip to drop at 21 High St”), and optionally set when — use Today 5pm / Tomorrow 7am / This weekend for speed.
- Anything with a time rings your phone then, and lists soonest-first; things with no date sit at the bottom.
- The “remind me” tick on + Materials (e.g. pick up mesh) drops into this same list.
- Tap Done to clear it. Your list syncs, so a to-do added on the Mac shows on your phone.
Materials & building an order
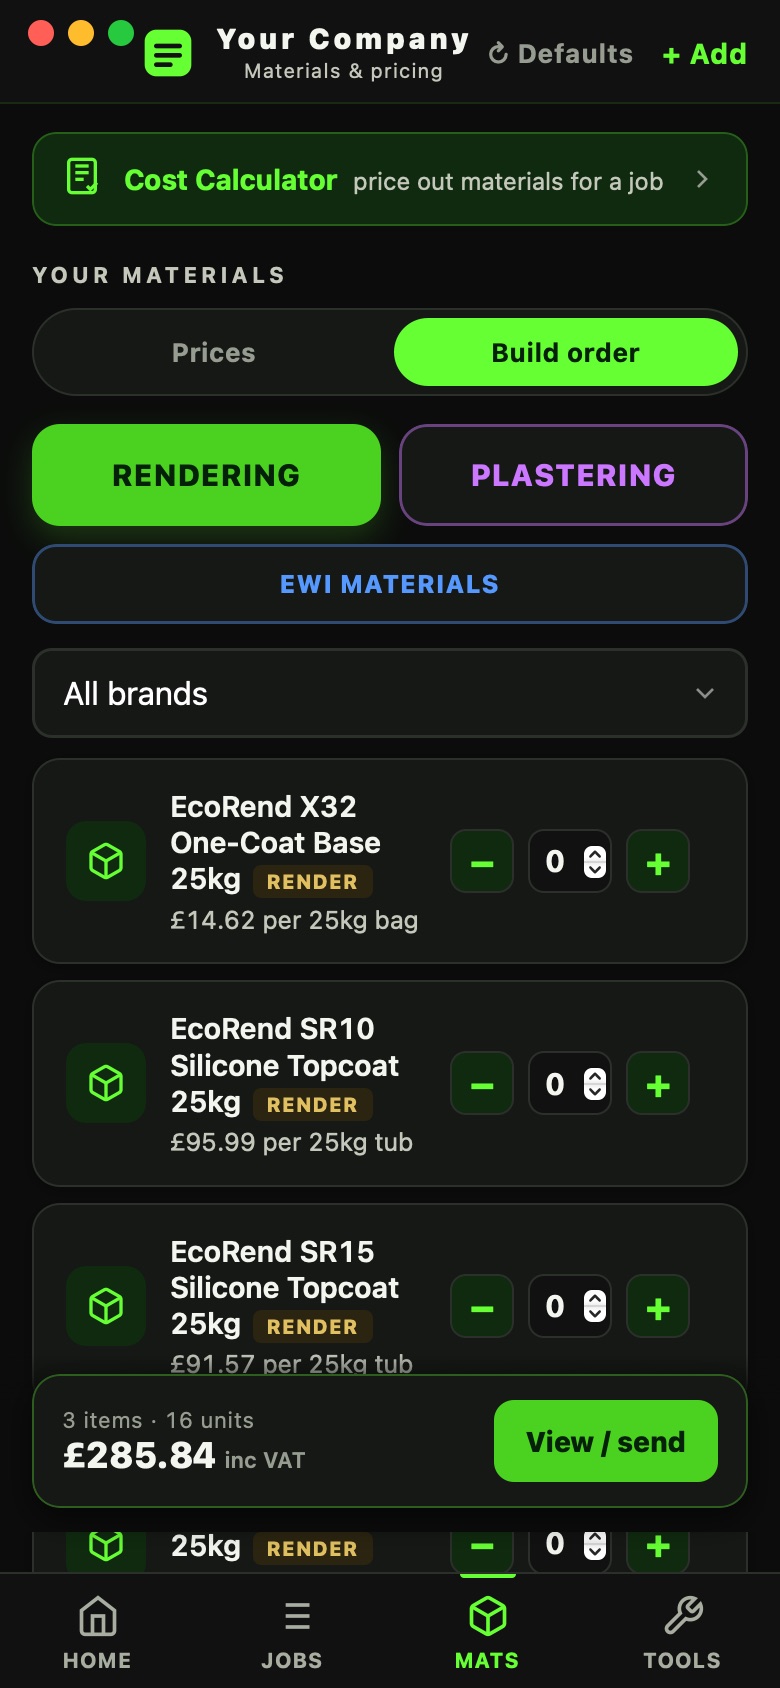
- Your materials list carries a price per unit (edit any to your own merchant's price).
- Switch to 🧾 Build order and use the − / + steppers to set how many of each you need.
- The bar at the bottom keeps a running total (inc VAT) as you add.
- View / send turns it into an order grouped by supplier — send it on WhatsApp, email or copy it.
Create & send the quote
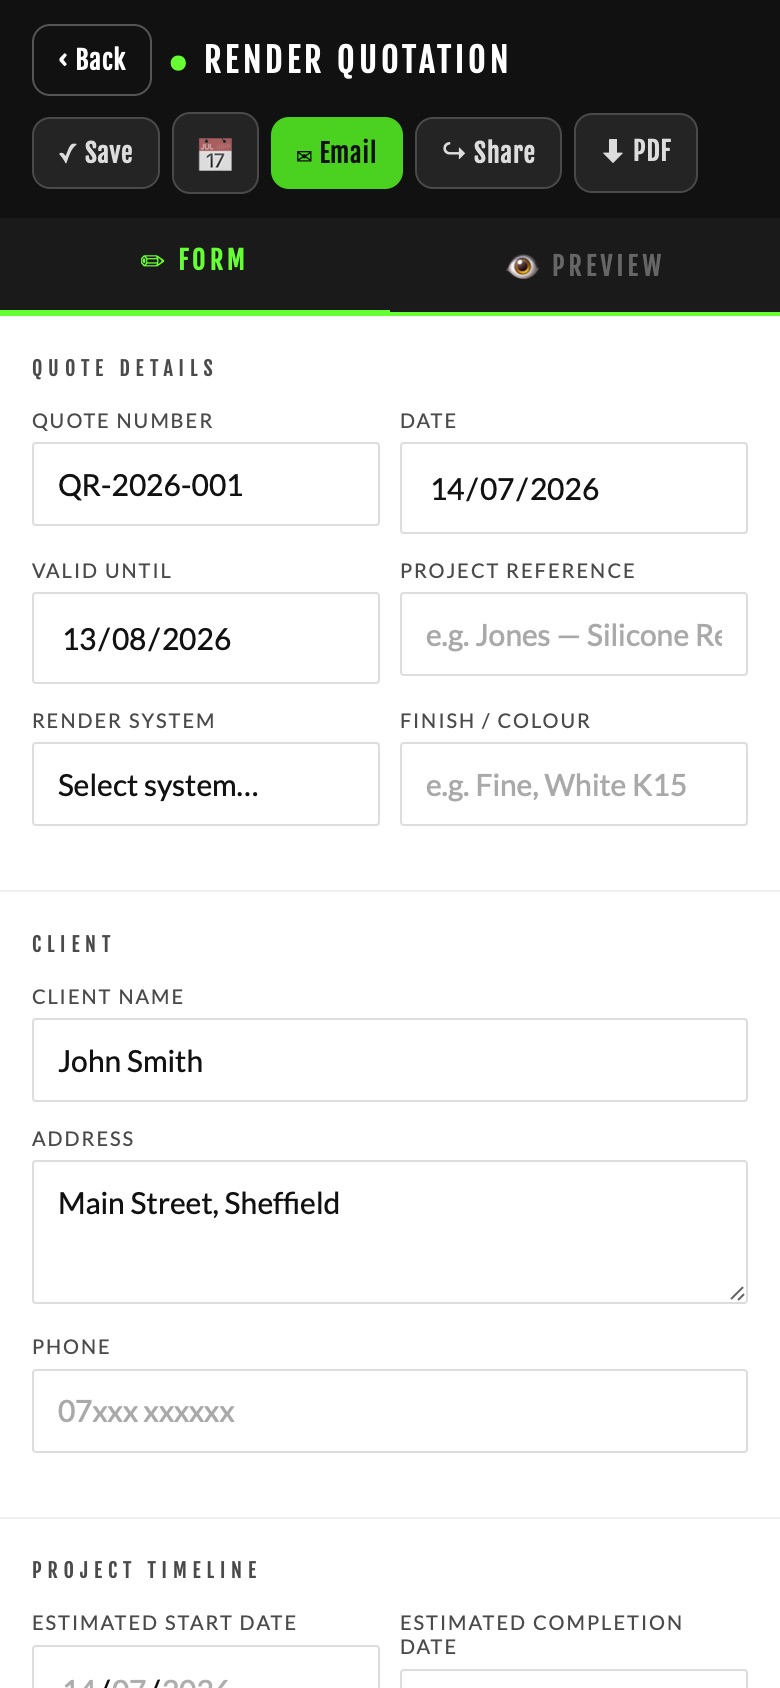
- From the job, tap New Quote — the customer, scope and price are already filled from the visit.
- Hit Preview to see the tidy sheet the customer gets.
- Send it with ✉ Email or ↪ Share (WhatsApp / Messages), or save a PDF.
- The customer can Accept or Decline from the email — you get an alert, and an accepted job books itself in.
On site — weather & reminders
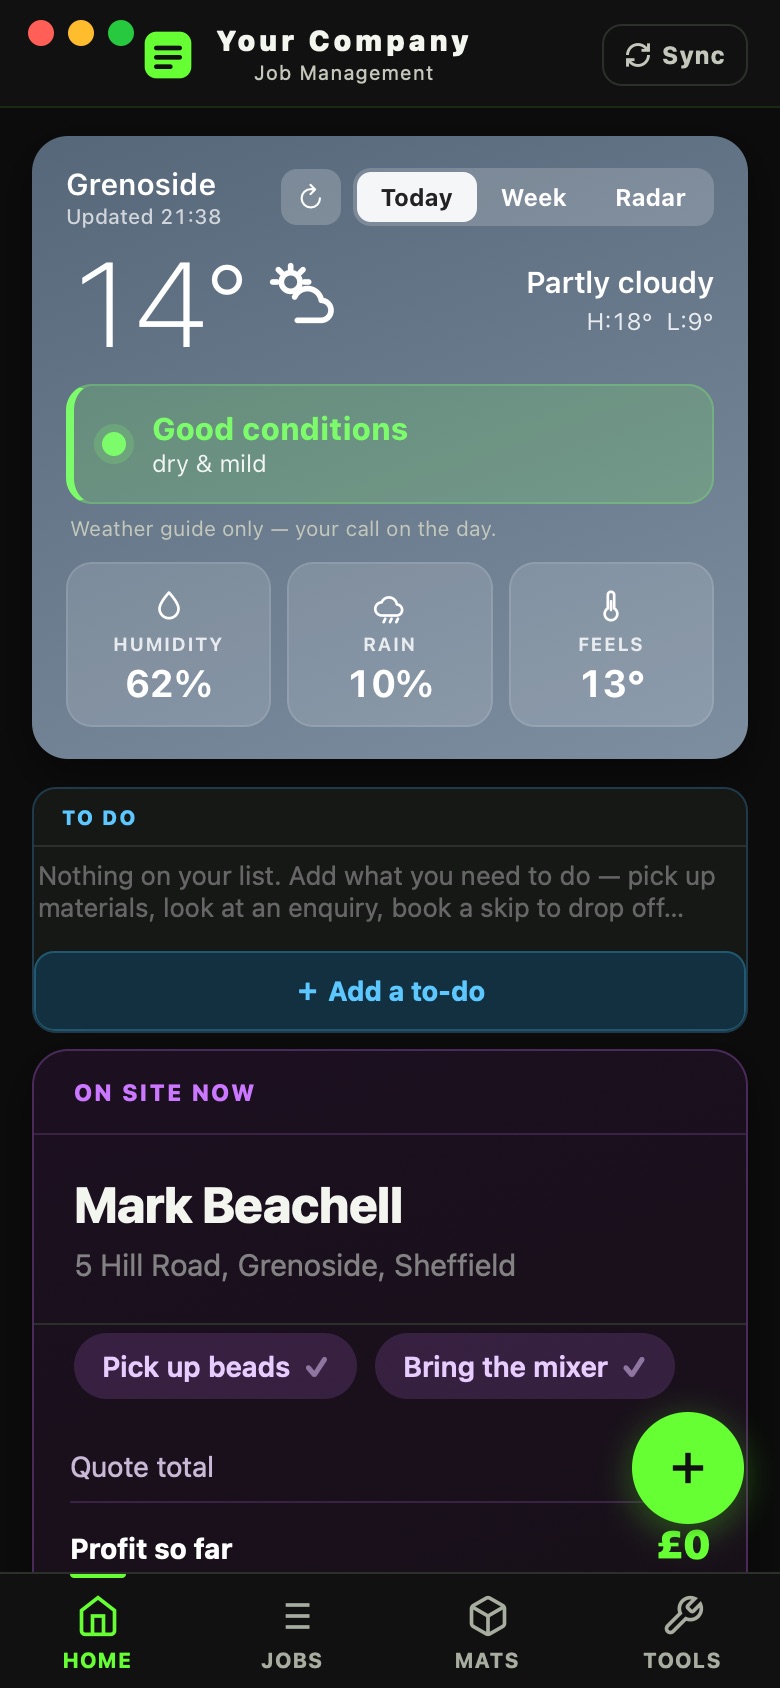
- The weather card gives a straight “can I render?” verdict — ✅ good, ⚠️ risky, 🚫 don't.
- It's built for render: it warns on frost, cold (<5°C), too hot (>30°C), humidity and rain.
- If rain is coming you get a warning — and (on the phone) a notification ~40 min before.
- Your reminders for today's job sit right on the on-site card — tick them off as you go.
Invoice & get paid
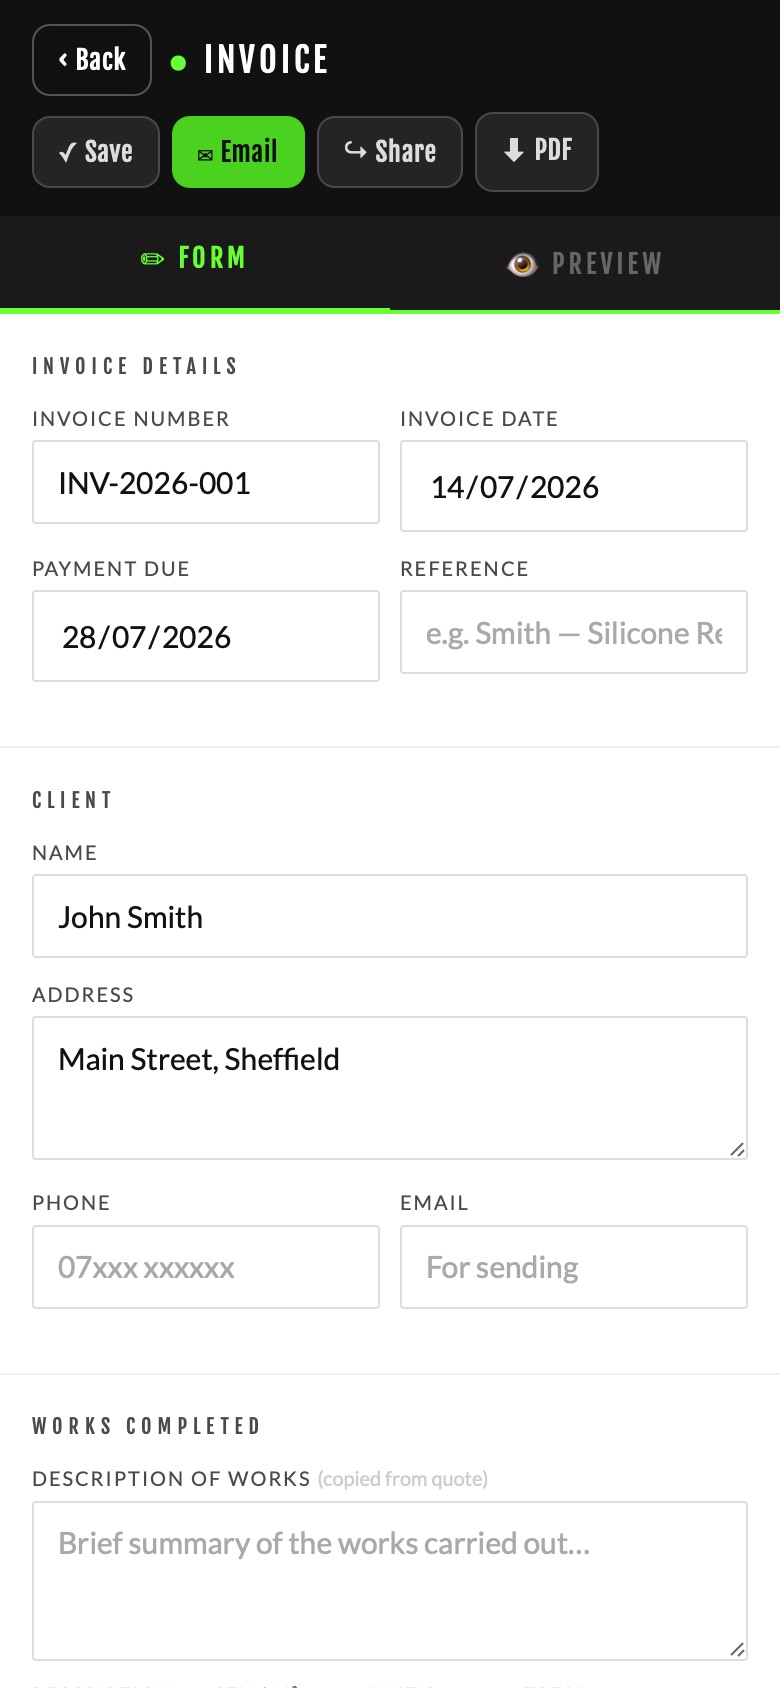
- Tap Invoice on the job — the works and totals come straight from the quote.
- Send it with ✉ Email / ↪ Share, or save a PDF.
- When they pay, open the job and tap Mark Paid — it moves to your Paid tab.
- Everything you send is filed under the customer in Tools → Records for your year-end.
Ask for a review
- Once the job's done, tap Ask for Review in the job's Workflow.
- It writes a friendly message with your Google review link ready to send on WhatsApp or text.
- More reviews that mention the service and the area help you show up in local searches.
More the app does
Job profit & costs
Open a job and it shows profit so far — the quote total minus your materials, days on site and other costs. Tap + Day, + Materials or + Other as you spend.
Key dates + tell the customer
Set the scaffold, skip and materials dates on a job. Anything flagged needs booking is waiting on a date; tap Tell [name] to send a ready-made update.
Weather — can I render?
The weather card gives a plain yes/no for rendering today (temperature, frost, humidity, rain) so you don't travel for nothing, and can warn you before rain if you turn it on.
Money & Records
Tools → Records files every quote and invoice under the customer, and the Money view totals what's paid vs awaiting — ready for your year-end.
Your prices & coverage
Mats → Prices holds your real material prices; coverage rates (m² per bag) in Business Details make every visit's material estimate right for how you work.
It's all yours, everywhere
Your jobs, prices and to-dos sync, so what you do on the Mac shows on your phone. Your logo and details go on every quote and invoice automatically.
Your look on every document
Business Details → Document style — six looks for your quotes and invoices (Classic, Letterhead, Bold, Minimal, Accent, Modern) plus your own accent colour. Tap Preview to see each on a real invoice before you pick.
Your words on the quote
The visit's Discussed With Customer box carries what you agreed on site onto the quote, printed in italics under the scope. General Notes stays private — it never appears on anything the customer sees.
Booked dates → your calendar
Book Date shows what you've already got booked, warns if dates clash, and Save + Add to My Calendar puts the job straight into your phone's calendar — address, notes and all.
Partitions & MF ceilings
Room cards handle new stud partitions (boarded both faces) and new MF ceilings — the scope writes itself and the estimate counts boards for both sides. Send messages by WhatsApp, text or email.