PlasterFlow  /  How it works

One job, start to finish. Here's every stage of it.

PlasterFlow is built around the way a plastering or rendering job actually runs: an enquiry, a look at it, a price, a start date, the work, an invoice. You put the measurements in once, on the visit. Everything after that — the scope of works, the materials, the quote, the invoice — is filled in from those same numbers.

Before the first job

Ten minutes of setting up, once

This is the only typing-in-your-own-details you ever do. It all syncs, so you do it on whichever device is handy and it's there on the others.
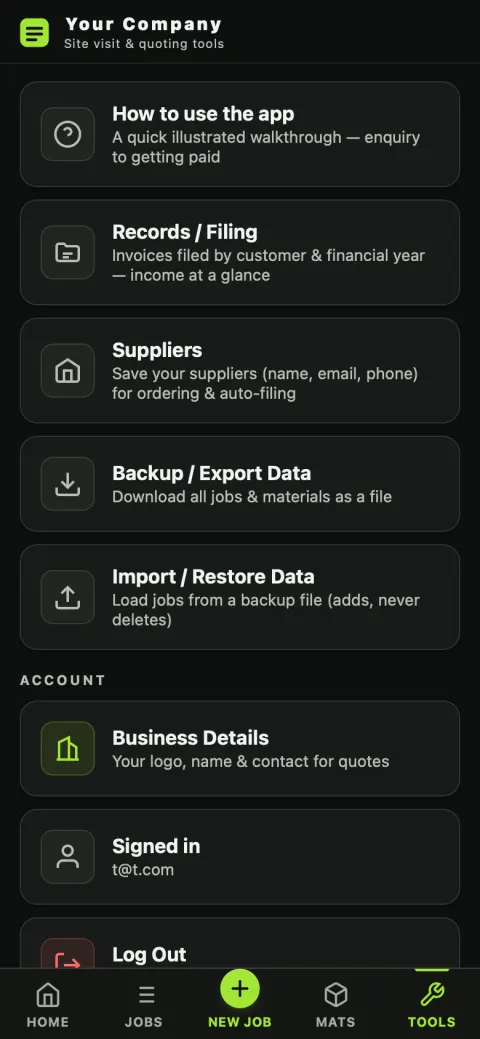
The PlasterFlow Tools screen, with Business Details, Records, Suppliers and backup options
Tools — everything that isn't a job
Setup

Your details go on every document automatically

Open Tools → Business Details and fill it in once. Your logo, business name, phone, address and email then print on every quote and invoice without you thinking about it again.

  • Bank details and payment terms — these become the “how to pay” block at the bottom of the invoice.
  • Your guarantee wording and your “why choose us” points — added to the end of every quote's scope, so your selling doesn't depend on you remembering to write it.
  • VAT — whether you're registered and at what rate. Not registered? The VAT lines simply don't appear.
  • Limited company details — registered name, company number and registered office, if you have them. Sole traders leave these blank and nothing prints.
  • Coverage rates (m² per bag) if you lay it on thicker or thinner than standard — this is what makes the material counts match what you actually order.
  • Document style — six looks plus your own accent colour, previewed on a real invoice before you choose.
Then check your prices. The app ships with generic trade prices so nothing is blank on day one, but go to Mats → Prices and put in what your merchant actually charges you. That single step is the difference between a quote that's roughly right and one you'd stand behind. More on prices →
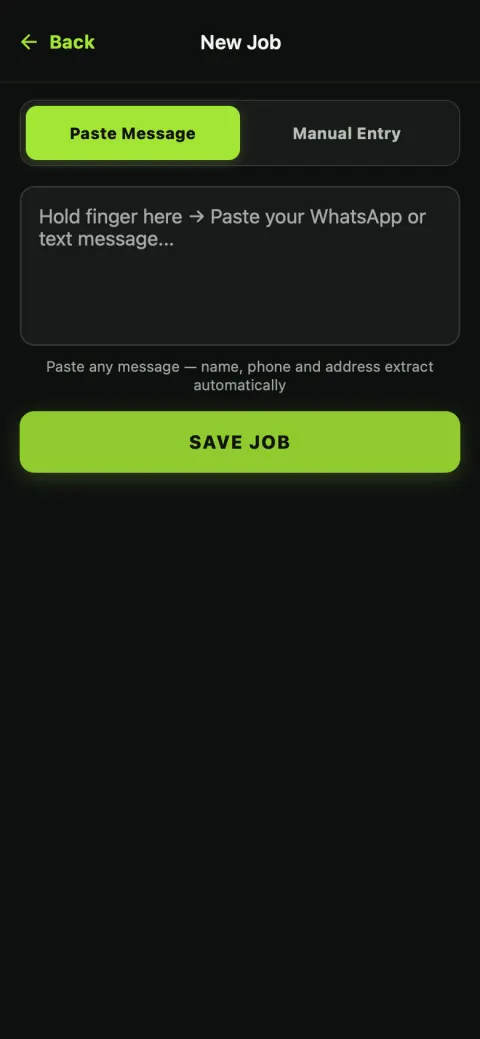
The New Job screen in PlasterFlow — customer name, address, phone and what they want
New Job — the whole enquiry in one screen
Stage 1

The enquiry comes in

Someone rings, texts, WhatsApps or fills in your website form. Tap the green in the middle of the bottom bar — that's the only “add” button in the app — and put in their name, address, phone and a line about what they want.

Or paste the message. If the enquiry came in as a text or an email, paste the whole thing in and the app reads the name, address, phone and type of work out of it and fills the fields for you. You check it rather than retype it.

Save, and the job exists. It starts life as an Enquiry, and from here the status moves itself along — quoted, booked, in progress, invoiced, paid — as you do the work. You never set a status by hand unless you want to.

Stage 2

The site visit is the important bit

This is the screen the whole app hangs off. Get the visit right and the quote, the materials list and the invoice are all correct without any more input from you — because they're all reading the same numbers.

A job open in PlasterFlow showing the workflow buttons — site visit, quote, book date, invoice, ask for review
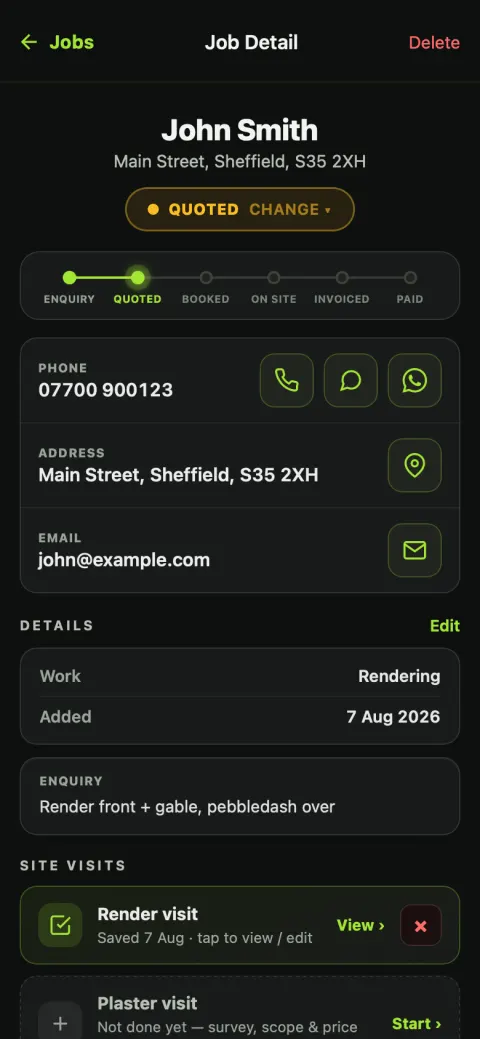
The job, with the workflow down the middle
Open the job

Everything for that customer, in one place

Tapping a job opens it out: their details with call, text and Maps buttons, and the workflow that runs the job top to bottom — Site Visit → Quote → Book Date → Invoice → Ask for Review. A tick appears on each stage once you've done it, so a job you haven't looked at for three weeks tells you where you left it.

There are two kinds of visit and the app picks by the work: a plastering visit that goes room by room, and a render visit that goes elevation by elevation.

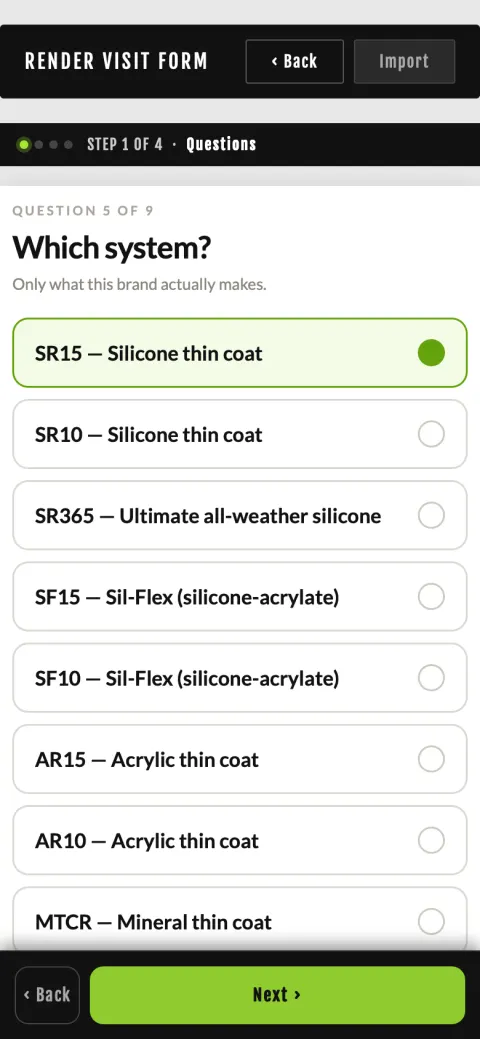
Choosing a render system in PlasterFlow — brand and system, which sets the price per square metre
Render visit — pick the system once
The questions

One question at a time, not a form staring at you

The visit asks you one thing, you answer it, it asks the next. You can do the whole thing walking round the house with the phone in one hand.

Rendering: pick the brand and system once — 9 brands, 80 systems, with the real product names and manufacturer build-ups behind them — and that sets the price per m² for the job. Then add an elevation for each wall with its width and height, tick hack off or building prep where it applies, and the area and price work themselves out.

Plastering: go room by room, choosing the method per room — skim, board and skim, dot & dab, bonding — plus specialist boards, and new stud partitions and MF ceilings where you're building rather than covering. A partition boarded both faces is counted as both faces.

  • Measure a wall from a photo if you can't get a tape on it — tap the two edges of a door and the app scales everything else from it.
  • When you'd start and how long you're on it — asked here, not later, because that's what turns into the booking.
  • Discussed with the customer — what you agreed standing in their hallway. It prints on the quote in italics, so nobody argues about it in six weeks.
  • General notes — your own notes. These never appear on anything the customer sees.
The visit is the single source of truth for the job's scope and price. If something changes, you change it on the visit and the quote follows — not the other way round. The site visit in detail →
Stage 3

The scope of works and the materials write themselves

This is the part that takes people an hour at the kitchen table. It happens while you're saving the visit.

A scope in proper words

From the system and methods you picked, the app writes the scope of works the way a customer needs to read it — the preparation, the products by name, the number of coats, the finish, the guarantee. Not “render front and gable”.

It's yours to edit if you want a different emphasis, but it starts complete rather than blank.

Every board and bag counted

The same measurements produce the materials take-off — boards, bags, mesh, beads, adhesive — using your coverage rates and your prices. It describes what it's charging you for, so if mesh is in the order it's in the scope too.

A price you can see the working of

Area × your rate for the system, plus prep, plus the extras you ticked. You can see what made the number, which matters when a customer asks why the gable costs what it does.

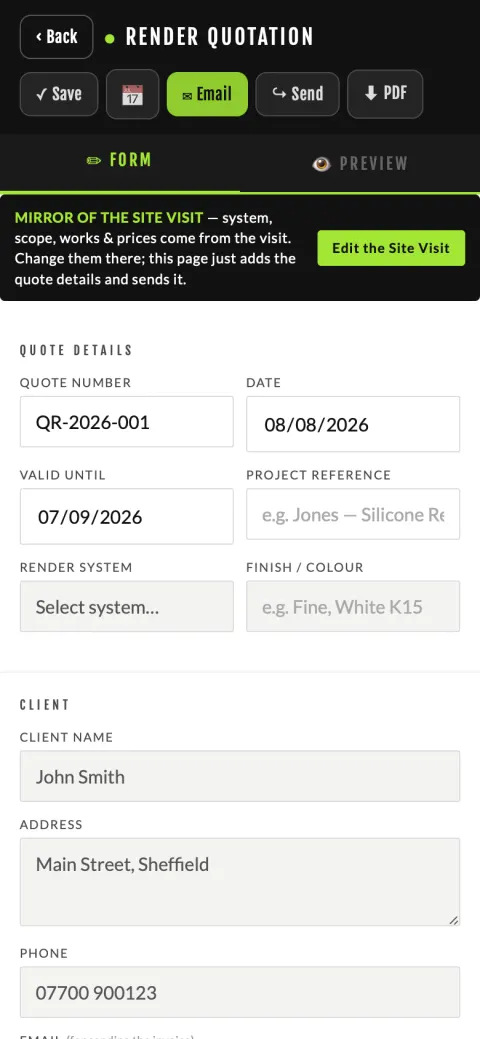
The quote screen in PlasterFlow, with the quote details already filled in from the site visit
Quote — a mirror of the visit
Stage 4

Save & quote — and it's already written

At the end of the visit, Save & quote. The customer, the scope, the works and the total are already in it; you're adding a quote number and a valid-until date, not writing a document.

Tap Preview to see the exact sheet the customer gets, on your chosen style with your logo on it. Then send it:

  • WhatsApp or text — goes through the share sheet so the PDF actually travels with the message.
  • Email — with the PDF attached and an accept/decline link in it.
  • PDF — saved down for your own records or printing.

The customer opens it on their phone and taps Accept or Decline. You get told either way, and an accepted quote moves the job on by itself.

Two prices for the same customer? Save & another quote raises a second one off the same visit — a cheaper option, a different system, the back of the house as well — and the first one stays exactly as it was. Quotes & invoices in detail →
Stage 5

They said yes — the date is the next problem

A calendar that knows what you've already sold

Because the visit asked when you'd start and how many days you're on it, booking is a confirmation rather than a puzzle. The calendar greys out the days you're already booked, so you can't double-book yourself, works the finish date out in working days — not calendar days — and warns you if a date clashes.

Save + Add to My Calendar drops it into your phone's own calendar with the address and the job notes, so it's there when you're not in the app.

The jobs list in PlasterFlow laid out by status — enquiry, quoted, booked, in progress

The things that hold a job up

Set the scaffold, skip and materials dates on the job. Anything still marked needs booking is waiting on you, and it says so rather than sitting quietly.

Tell the customer, without writing it

Tap Tell [name] and it drafts the update — when you're starting, what's happening first — ready to send on WhatsApp, text or email.

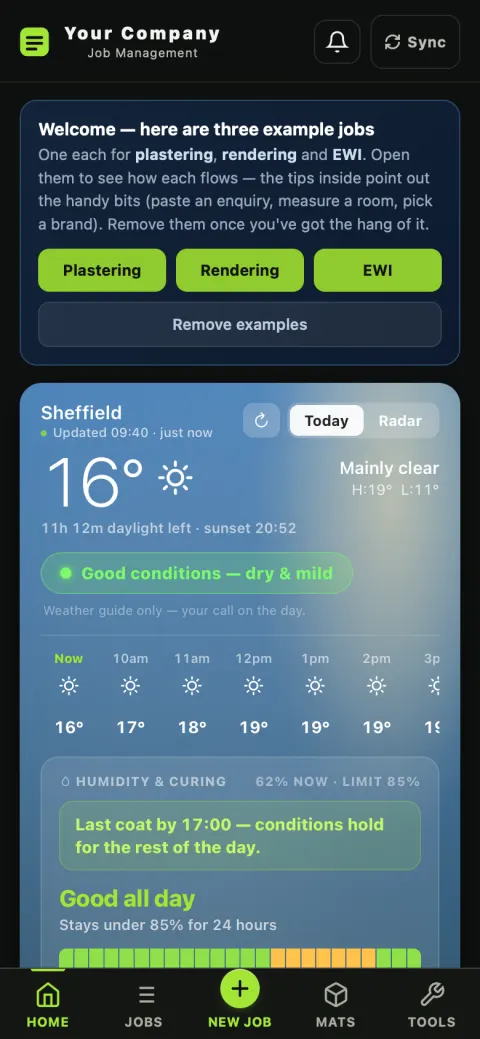
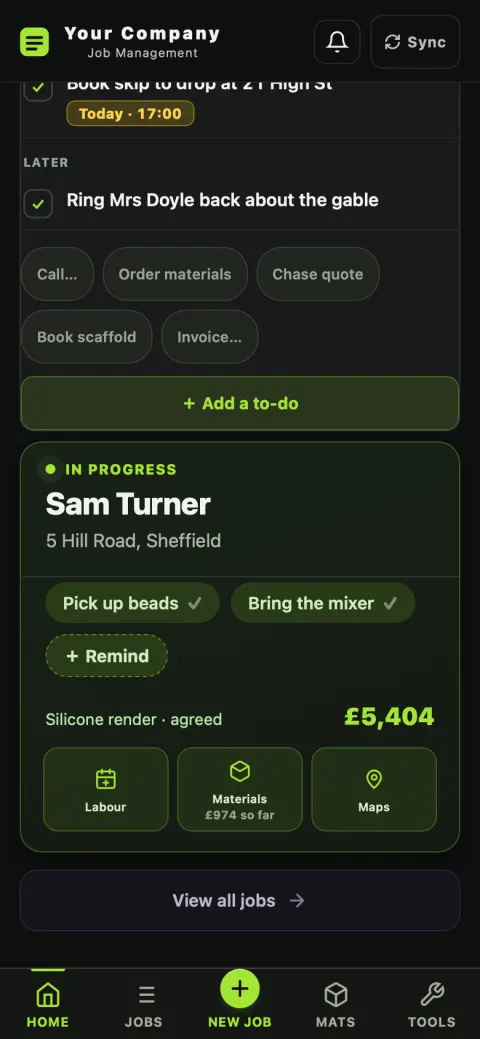
The job you are on today on the PlasterFlow home screen — in progress, with its reminders, the agreed value and buttons for adding labour and materials
Home — the job you're on today
Stage 6

On site: what's today, and can I actually render it

Home is the “where am I” screen. The job you're on today is the biggest thing on it, with its reminders as chips you tick off as you do them, and above it the weather card — because for a renderer that's the first decision of the day.

The verdict is a plain yes, risky or no, worked out on the things that actually ruin render: temperature (under 5°C or over 30°C), frost, humidity against the 85% limit, and rain in millimetres rather than a percentage chance. It also gives you a curing window — the last time today you can put a coat on and expect it to hold — and a live rain radar so you can see a shower coming rather than guess.

  • A 7am brief on your phone, if you want it: today's job, the verdict, what needs chasing.
  • A rain warning roughly 40 minutes before it reaches you.
  • Costs as you spend+ Day, + Materials, + Other. The job's profit so far updates as you go.
  • Extra works if the job grows. It raises a second quote on top of the agreed one; the figure they already accepted doesn't move.
The weather is a guide, not an instruction — the app says so on the card. It's there so you don't drive across the county to find out. How the verdict is worked out →
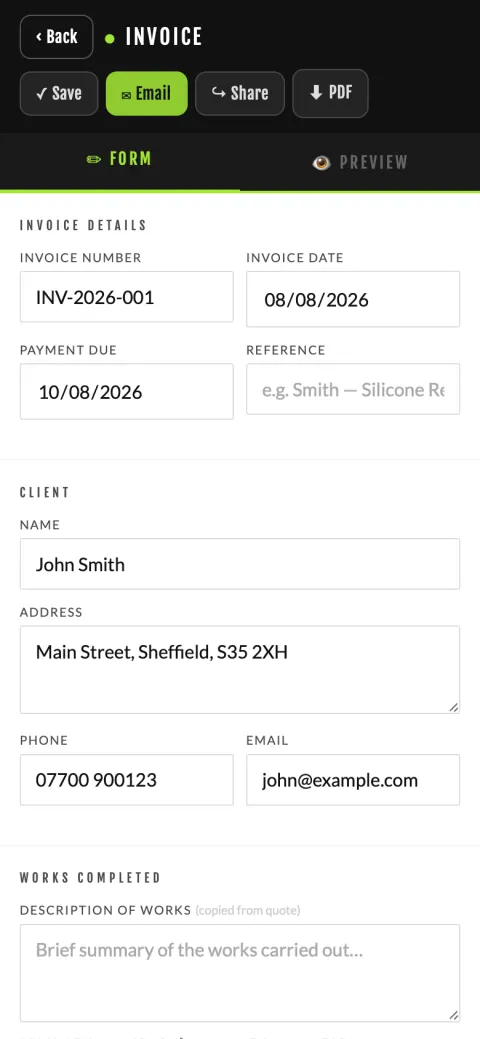
An invoice in PlasterFlow with the works, totals and payment details carried over from the quote
Invoice — totals straight off the quote
Stage 7

Invoice and get paid

Tap Invoice on the job. The works summary and the totals come off the accepted quote, your bank details and payment terms are already on it, and your terms and conditions are on the back — eleven clauses covering guarantee, liability, variations and payment, written to be brand-neutral so they read as yours.

Send it the same way as the quote — email, WhatsApp, text or PDF. When the money lands, move the job's status to Paid and it drops into your Paid list.

  • Extras go on the invoice, not back into the visit — a skip charge, an extra day, the bit they asked for on the Friday.
  • Everything is filed under the customer in Tools → Records, by financial year, so year-end is a folder rather than a hunt.
  • Money totals what's been paid against what you're still waiting on.
Stage 8

After the job — the bit everyone skips

Ask for the review while they're happy

Ask for Review writes a friendly message with your Google review link in it, ready to send. Reviews that mention the service and the area are the ones that bring you local work, so it nudges towards those.

The job stays findable

Quote, invoice, photos, what you agreed, what it cost and what you made — all still on the job. When they ring back in two years about the gable, it's one search.

And it's all on every device

Phone, Mac and web on the one account. Add a to-do at the merchant's, it's on the Mac when you get in. Jobs & money →

That's the whole job

14 days free, no card. Put a real job through it — that's the only test that tells you anything.